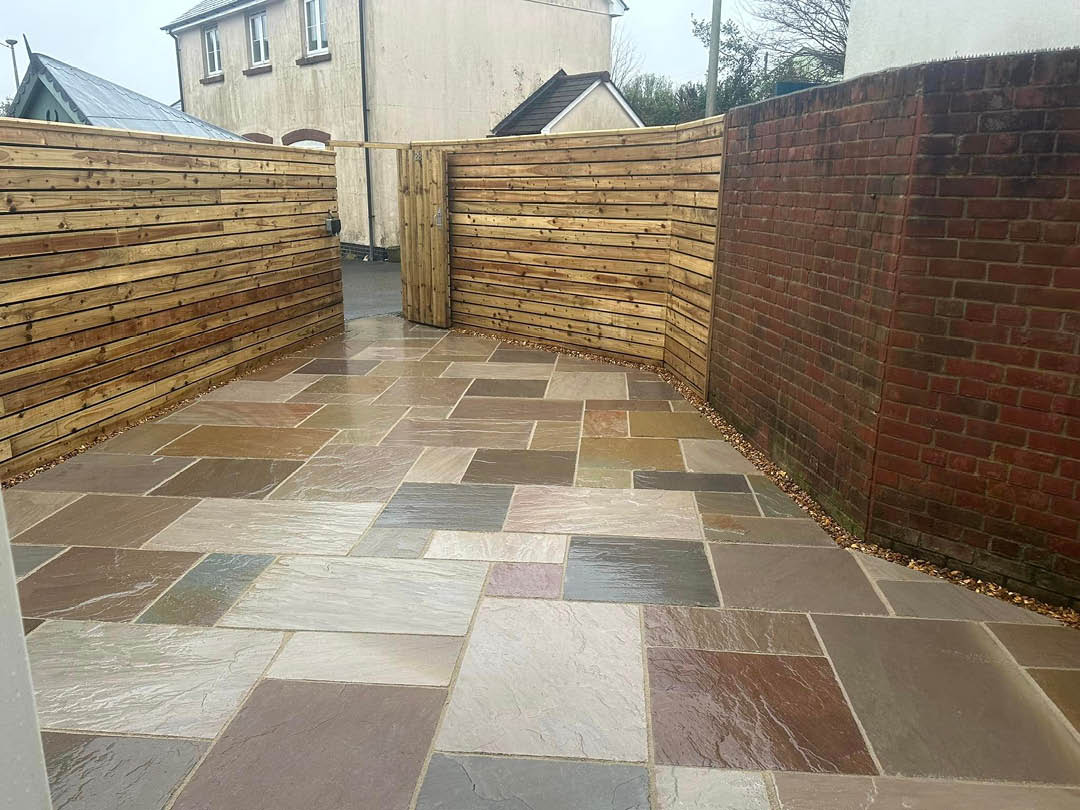
How to Lay a Patio for Beginners: Introduction
A well‑laid patio can transform your garden into a functional, stylish outdoor living space. Whether you want a spot for summer barbecues, a quiet retreat for morning coffee, or a durable surface for entertaining, patios are one of the most rewarding DIY projects you can tackle. But if you’re new to landscaping, the process can feel daunting.
This patio guide is designed to walk you through how to lay a patio for beginners step by step. From planning and preparation to laying paving slabs and finishing with neat pointing, you’ll learn the essentials of creating a patio that looks professional and lasts for years.
And if you’d rather leave the heavy lifting to the experts, remember that Westcountry Fencing & Decking offers professional patio installation across Plymouth and Devon, ensuring a flawless finish without the stress.
Can a Beginner Lay a Patio?
The short answer is yes. With the right tools, materials, and preparation, even a first‑timer can achieve a great result. The key is patience and attention to detail. Unlike painting a wall or assembling flat‑pack furniture, laying a patio involves groundwork, levelling, and precise placement.
That said, there are limits. If your garden has tricky slopes, drainage issues, or you’re planning a large patio area, hiring professionals may save you time and costly mistakes. For smaller projects, this patio guide will give you the confidence to get started.
Planning Your Patio
Choosing the Location
- Pick a flat, accessible area that complements your garden layout.
- Avoid placing slabs directly against your house wall; always leave at least 150mm below the damp proof course.
- Consider sunlight: south‑facing patios are great for warmth, while shaded spots may suit dining areas.
Measuring and Marking Out
- Use wooden pegs, string lines, and a tape measure to mark the patio area.
- Check diagonals to ensure the layout is square.
- Calculate the total square metres to order the correct number of paving slabs.
Tools and Materials Checklist
- Tools: spade, wheelbarrow, rake, spirit level, rubber mallet, pointing trowel, compactor.
- Materials: MOT Type 1 sub‑base, sharp sand, cement, paving slabs (concrete, natural stone, or porcelain), jointing compound, priming slurry (for porcelain).
Preparing the Ground
Excavation
- Dig to a depth of around 150–200mm below the finished patio level.
- Remove all turf, roots, and soft soil.
- Ensure the base is firm and even.
Creating a Sub‑Base
- Spread a 100mm layer of MOT Type 1 hardcore.
- Compact thoroughly with a wacker plate.
- This prevents sinking and ensures long‑term stability.
Drainage and Slope
- Patios should slope away from your house at a gradient of 1:60 (approx. 16mm per metre).
- This prevents water pooling and protects your property.
Mixing Mortar and Preparing Slabs
Mortar Bed
- Mix 5 parts sharp sand to 1 part cement.
- Add water gradually until you achieve a workable consistency.
- Spread a full mortar bed 40mm thick; never spot‑bed slabs, as this causes rocking and cracks.
Priming Slabs
- For porcelain or non‑porous paving, apply a priming slurry to the underside before laying.
- This improves adhesion and prevents lifting.
Laying the First Slab
- Start in a corner or along a straight edge.
- Place the slab onto the mortar bed.
- Tap gently with a rubber mallet until level.
- Check alignment with a spirit level and string line.
This first slab sets the standard; take your time to get it perfect.
Laying the Remaining Slabs
Dry Laying
- Before committing to mortar, dry lay slabs to check the pattern and spacing.
- Popular patterns include stretcher bond, herringbone, and random layouts.
Setting Each Slab
- Spread mortar, place slab, tap level.
- Maintain consistent gaps (3–10mm depending on style).
- Keep checking levels and slope.
Cutting Slabs
- Use a slab cutter or angle grinder with a diamond blade.
- Always wear safety goggles and gloves.
Pointing and Finishing
Filling Joints
- Once slabs are set (24–48 hours), fill joints with jointing compound or mortar.
- Brush compound into gaps, mist lightly with water, and compact with a pointing tool.
Cleaning and Sealing
- Sweep away excess compound.
- For natural stone, consider applying a sealant to protect against stains and frost damage.
Aftercare and Maintenance
- Cleaning: Sweep regularly and wash with mild detergent.
- Weeds: Use jointing compound to minimise weed growth.
- Winter care: Avoid using salt on natural stone; use sand or grit instead.
- Repairs: Replace cracked slabs promptly to prevent spreading damage.
FAQs: How to Lay a Patio
Q: What do you put under patio slabs?
A: A compacted sub‑base of MOT Type 1 hardcore topped with a full mortar bed.
Q: Can you lay a patio on sand only?
A: No, sand alone shifts over time. Always use a cement mortar bed for stability.
Q: How much does a patio cost in the UK?
A: On average, £80–£120 per m² for professional installation, depending on materials.
Q: What time of year is best to lay a patio?
A: Spring and early autumn are ideal, but patios can be laid in winter if frost is avoided.
Conclusion
Laying a patio may seem like a big project, but with careful planning, the right tools, and patience, it’s achievable even for beginners. This patio guide has shown you step by step how to lay a patio for beginners, from excavation and sub‑base preparation to laying slabs and finishing with neat pointing.
If you’d prefer a professional finish without the hassle, Westcountry Fencing & Decking offers expert patio installation across Plymouth, Ivybridge, Plympton, Plymstock, Totnes, Paignton, Torquay, and beyond. With years of experience and a reputation for quality, we’ll help you create a patio that’s built to last.
Contact us today for a free quote and let’s make your dream garden a reality.
